
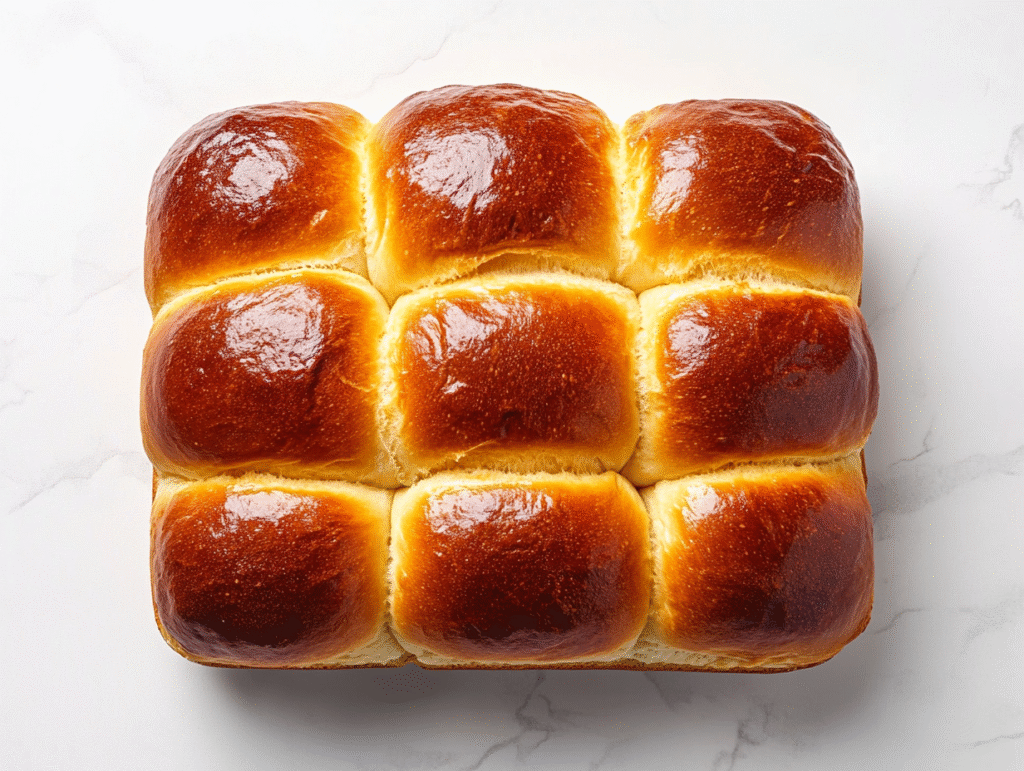
Howdy, foodies! Austin here from beyondhebayoublog, and today I’m excited to share one of my all-time favorite baking recipes with y’all: Japanese Milk Bread! Now, let me tell ya, mastering the art of baking this pillowy-soft bread has been a game-changer in my kitchen.
There’s just something magical about the way Japanese Milk Bread turns out – perfectly tender, slightly sweet, and oh-so-fluffy. It’s like biting into a cloud!
I remember the first time I baked this bread – the aroma of warm, freshly baked loaves filled my kitchen, and I couldn’t resist tearing off a piece right away. The taste? Pure bliss.
So, if you’re ready to elevate your baking skills and conquer the world of homemade bread, this Japanese Milk Bread recipe is your ticket to success. Trust me, once you try it, you’ll never look back. Let’s get bakin’! It is also served with Egg Bites and Egg Quesadilla, thus a must-try for you.
What Is Japanese Milk Bread?
Japanese milk bread, also known as Hokkaido milk bread or shokupan, is a delightful creation originating from Japan. It’s renowned for its uniquely soft, fluffy texture and subtle sweetness, distinguishing it as a beloved staple in Japanese bakeries and homes alike, and gaining popularity across the globe.
The key ingredients of Japanese milk bread typically include bread flour, milk, sugar, yeast, and sometimes butter or cream. These components, combined in precise proportions, yield a dough that’s supple and easy to work with, resulting in bread with an exceptionally tender crumb and a delicate sweetness that’s utterly irresistible.read, you must try the Almond Cookies for that perfect combination!

Jiggly Japanese Milk Bread Recipe
Equipment
- 1 Mixing Bowls – You'll need mixing bowls to combine and knead the ingredients for the dough.
- 1 Measuring cups and spoons – Accurate measurements are important for baking, so having measuring cups and spoons on hand is essential.
- 1 Stand mixer or hand mixer – While you can knead the dough by hand, a stand mixer or hand mixer with dough hook attachments can make the process easier and faster.
- 1 Loaf Pans or Baking Sheets – Depending on the shape of the bread you want to make, you'll need either loaf pans for traditional loaves or baking sheets for rolls or buns.
- 1 Plastic Wrap or Kitchen Towels – You'll need something to cover the dough while it's rising to prevent it from drying out.
- 1 Pastry Brush – A pastry brush comes in handy for brushing melted butter or egg wash onto the dough before baking to give it a golden brown crust.
- 1 Cooling Rack – After baking, it's important to cool the bread on a wire cooling rack to prevent the bottom from becoming soggy.
- 1 Sharp Knife or Bread Lame – If you want to score the bread before baking to control the expansion of the dough, a sharp knife or bread lame is useful.
Ingredients
- 4 and 1/2 Cup Bread Flour
- 1/2 Cup Granulated Sugar
- 1 tbsp Salt
- 1 tsp Active Dry Yeast
- 1/2 Cup Warm Milk
- 1/2 Cup Warm Water
- 1 Stick Unsalted Butter
- 4 Eggs
Instructions
- Activate the yeast: In a small bowl, combine warm milk, warm water, and a teaspoon of sugar. Sprinkle active dry yeast over the mixture and let it sit for about 5-10 minutes until frothy and bubbly, indicating that the yeast is active.
- Mix the dough: In a large mixing bowl or the bowl of a stand mixer fitted with a dough hook attachment, combine 4 – 4.5 cups of bread flour, sugar, and salt. Make a well in the center of the dry ingredients and pour in the yeast mixture, softened butter, and beaten egg.
- Knead the dough: Mix the ingredients together until a rough dough forms, then knead the dough on a lightly floured surface or in the stand mixer for about 10-15 minutes until smooth and elastic. The dough should be soft and slightly sticky but not overly wet.
- First rise: Shape the dough into a ball and place it in a greased bowl. Cover the bowl with plastic wrap or a clean kitchen towel and let the dough rise in a warm, draft-free place for about 1-2 hours, or until doubled in size.
- Shape the dough: Once the dough has doubled in size, gently punch it down to release any air bubbles, then divide it into equal portions. Shape each portion into a ball or loaf and place them in greased loaf pans or on a baking sheet lined with parchment paper.
- Second rise: Cover the shaped dough with plastic wrap or a clean kitchen towel and let it rise again in a warm, draft-free place for about 30-60 minutes, or until doubled in size.
- Preheat the oven: While the dough is rising, preheat your oven to 350°F (175°C).
- Bake the bread: Once the dough has doubled in size, bake it in the preheated oven for about 25-30 minutes, or until golden brown and cooked through. If you're unsure, you can check for doneness by tapping the bottom of the bread – it should sound hollow.
- Cool and enjoy: Remove the bread from the oven and let it cool in the pan for a few minutes before transferring it to a wire rack to cool completely. Once cooled, slice and enjoy your homemade Japanese milk bread!
Notes
- Flour: For the best results, use bread flour instead of all-purpose flour. Bread flour has a higher protein content, which helps create the bread’s soft and chewy texture.
- Milk: Use whole milk for a richer flavor and a softer crumb. You can also use other types of milk such as skim or soy milk, but keep in mind that it may affect the texture and flavor of the bread slightly.
- Yeast: Make sure your yeast is fresh and active. If your yeast doesn’t foam or bubble when dissolved in warm water, it may be expired or inactive, and your bread may not rise properly.
- Kneading: Proper kneading is essential for developing gluten and creating a light and airy texture in the bread. Knead the dough until it is smooth, elastic, and springs back when pressed with your finger.
- Rising: The dough should be allowed to rise until it doubles in size during both the first and second rise. This process is crucial for developing flavor and creating a soft and fluffy texture in the bread.
- Baking: Bake the bread until it is golden brown on top and sounds hollow when tapped on the bottom. Overbaking can result in a dry and tough texture, so keep an eye on the bread towards the end of the baking time.
- Cooling: Allow the bread to cool completely on a wire rack before slicing and serving. This helps prevent the bread from becoming soggy and allows the flavors to fully develop.
- Storage: Store leftover bread in an airtight container or plastic bag at room temperature for up to 2-3 days. You can also freeze the bread for longer storage. To reheat frozen bread, simply thaw it at room temperature or warm it in the oven for a few minutes.
Nutrition
What to Serve With The Japanese Milk Bread?
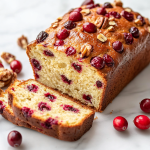
- Cranberry Bread
- Fluffy Pumpkin Pancakes
- Ham and Swiss Quiche
- Dutch Baby Pancake
- KOLACHES W/ JALAPEÑO & CHEESE
Time For Tips!
- Use Bread Flour: Opt for bread flour instead of all-purpose flour for a higher protein content, which helps create a soft and chewy texture in the bread.
- Activate the Yeast Properly: Ensure the yeast is fresh and active by proofing it in warm milk and water with a pinch of sugar. The mixture should become frothy and bubbly within 5-10 minutes.
- Knead Thoroughly: Proper kneading is essential for developing gluten and creating a light and airy texture. Knead the dough until it’s smooth and elastic, and springs back when pressed with a finger.
- Allow Sufficient Rising Time: Be patient during the rising stages to allow the dough to double in size. This is crucial for developing flavor and achieving the desired texture.
- Shape with Care: Take your time when shaping the dough into a loaf or rolls, ensuring even distribution of air bubbles and a uniform shape.
- Bake at the Right Temperature: Preheat your oven to the correct temperature (usually around 350°F or 175°C) and bake the bread until it’s golden brown on top and sounds hollow when tapped on the bottom.
- Cool Properly: Allow the bread to cool completely on a wire rack before slicing. This helps prevent it from becoming soggy and allows the flavors to fully develop.
- Store Correctly: Store leftover bread in an airtight container or plastic bag at room temperature for up to 2-3 days. You can also freeze the bread for longer storage and reheat slices as needed.

David
Sunday 24th of March 2024
There is nowhere near enough flour as it is written now. I had to put in a total of 4.25 cups to get it to even resemble a very wet dough.
Austin Carter
Wednesday 31st of July 2024
Hi David, thank you for catching that! It looks like there was an error in the flour measurement. The correct amount should be 4-4.5 cups of bread flour. I've updated the recipe accordingly. I appreciate your attention to detail and hope you enjoy the revised version!
Lisa
Monday 11th of March 2024
This recipe says to use only 1 cup of bread flour. Then 1 cup each of water and milk. Is that correct?
Austin Carter
Wednesday 13th of March 2024
May be a typo, Thanks for bringing it to our concern.