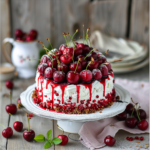
Today, I’m excited to share a simple yet heavenly delight – my homemade Chantilly Cake recipe. I’ve picked up a thing or two about what makes a dessert truly special.
This Chantilly Cake is a labor of love, born out of my passion for creating dishes that not only satisfy the taste buds but also warm the heart.
Picture this: layers of moist, vanilla goodness embraced by a cloud-like Chantilly cream frosting. It’s the kind of treat that transports you to a cozy Sunday afternoon, surrounded by the comforting aroma of baking. I’ve kept it fuss-free because, let’s face it, we all want a slice of happiness without a complicated recipe.
So, whether you’re a seasoned home chef or a kitchen newbie, grab your apron, and let’s dive into the simple joy of making and savoring this Chantilly Cake together. Happy baking! It will be a cherry over the cake if you serve it with my Fruit Salad with Whipped Cream.
Try More Such Recipes!
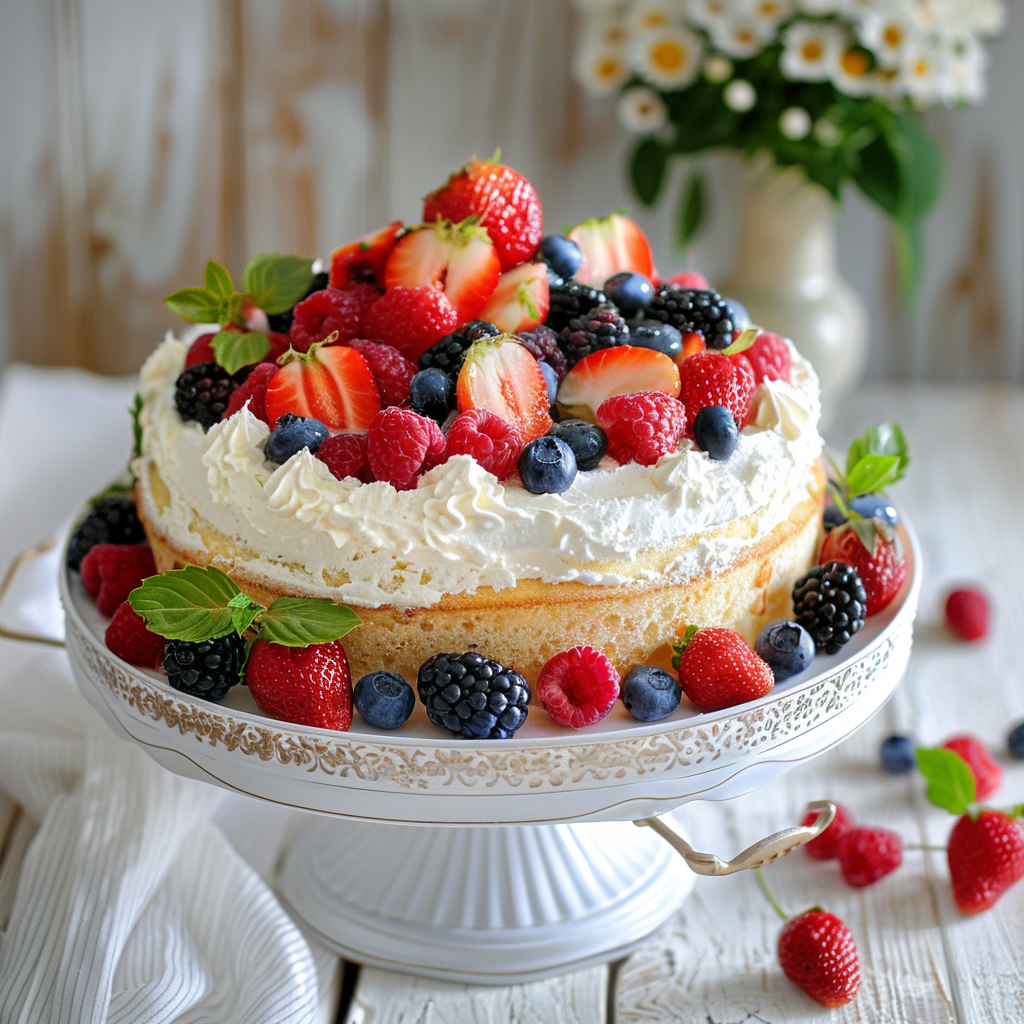
Sweet Symphony Chantilly Cake Recipe
Equipment
- Stand Mixer
- Round Piping Tip and Piping Bag
Ingredients
- 3 large eggs
- 3 oz vegetable oil
- 10 oz whole milk
- 1 tsp almond extract
- 2 tsp vanilla extract
- 8 oz butter unsalted
- 1/2 tsp salt
- 1/2 tsp baking soda
- 3 tsp baking powder
- 12 oz granulated sugar
- 13 oz bleached cake flour
Chantilly Cream Ingredients
- 16 oz cream cheese softened
- 8 oz unsalted butter softened
- 16 oz mascarpone cheese softened
- 22 oz powdered sugar sifted
- 1 tsp almond extract
- 1 tsp vanilla extract
- 8 oz heavy whipping cream
- 2 tsp instant pudding mix
Berry Cake Filling
- 2 cups fresh or frozen berries
- 2.5 oz sugar
- 1 oz water
- 1 oz cornstarch
- 1 tsp lemon zest
- 2 tsp lamon juice
Instructions
Vanilla Cake Instructions
- Heat your oven to a range between 335º F/168º C and 350º F/177º C. I usually stick to the lower setting to avoid over-browning the cake outside before it's fully baked inside.
- Set aside 4oz of milk and oil in a separate bowl or cup. In another measuring cup, mix the remaining milk, vanilla extract, almond extract, and room temperature eggs.
- Measure out the dry ingredients (flour, sugar, baking powder, baking soda, and salt) and place them in the stand mixer bowl.
- Attach the paddle, add softened butter in chunks, and mix until it looks like coarse sand.
- Add the milk/oil mixture into the dry ingredients and mix on medium speed for 2 full minutes (speed 4 on my KitchenAid).
- Then, add ⅓ of the milk/egg mixture three times until the batter is just combined. Don't forget to scrape the bowl!
Chantilly Cream Instructions
- Cream together the softened butter, cream cheese and mascarpone cheese together until smooth.
- Add in the powdered sugar and continue creaming until combined
- Whip the cream until soft peaks form. Add pudding mix to stabilize, whip until just combined.
- Mix in vanilla and almond extract. Peaks should be firm but not curdled.
- Keep an eye on the cream; it happens fast! Check out the stabilized whipped cream recipe for alternatives to pudding.
- Fold your cream cheese mixture and whipped cream together to make your frosting.
Berry Cake Filling
- Put berries and 2.5 oz sugar in a saucepan, bring to a simmer.
- Mix cornstarch with cold water, pour into berries.
- Cook until thickened (1-2 minutes).
- Remove from heat, stir in lemon zest and juice.
- Let the berry filling cool before using.
Notes
- Choose Your Pan: I used two 8″x2″ round cake pans, but feel free to use the cake batter calculator for different sizes. Flexibility is key!
- Room Temperature Magic: Ensure all ingredients (eggs, cream cheese, milk, butter, etc.) are at room temperature for the perfect blend. Check my blog for room temperature hacks.
- Weigh It Right: Use a scale to weigh all ingredients, even liquids (unless stated otherwise). Metric measurements are in the recipe card for precision. Scales rule, cups drool – accuracy is your recipe’s BFF.
- Mise en Place FTW: Prep like a chef – have everything measured and ready before mixing. No more “Oops, I forgot the sugar” moments.
- Cool and Chill: Chill cakes before frosting; it’s fondant-friendly. Great for stacking and transporting – I refrigerate before delivery. Learn cake decorating basics for a stunning finish.
- Follow the Flour Rules: Don’t swap cake flour for all-purpose without a green light from the recipe. Substituting might lead to recipe roadblocks. All-purpose flour lacks the protein punch of cake flour (10%-12% vs. 9% or less).
Nutrition
Times for The Tips!
- Prep-Ahead Cake Layers: Make life easy by baking those white cake layers ahead. Pop them in plastic wrap and stash them at room temp for two days, or in the freezer for up to two months. Your call!
- Chill with the Frosting: Hold off on making the berry Chantilly frosting too early. It’s a diva and loses its fluffiness in a tight container. Whip it up right before your assembly party for the best results.
- Plan Your Assembly: Feel like prepping in advance? Assemble the cake up to a day before your grand dessert moment and keep it cool in the fridge. Leftovers are cool too – store ’em covered for up to 4 days.
- Freeze the Cake Layers, Not the Whole Shebang: While the assembled cake isn’t a freezer fan, you can totally freeze those white cake layers in advance for up to 2 months. Just thaw and let them join the party when you’re ready.