Hey,Welcome to my kittchen Beyond the Bayou Blog, where I share my love for baking and cooking. Today I’m gonna share with you Italian Easter Bread Recipe. I’m just your average home cook trying to make delicious meals like Oat Bread, Banana Bread and many more for my loved ones. One thing I’ve learned on this journey is that some recipes are more than just food—they’re memories waiting to be made.
I remember the first time I attempted to make Italian Easter bread. It was a sunny Saturday morning, and I had decided to tackle this traditional recipe I found online. As I gathered the ingredients and started kneading the dough, I couldn’t help but feel a sense of excitement mixed with a hint of nervousness. Would it turn out as delicious as I hoped? Would my family enjoy it?
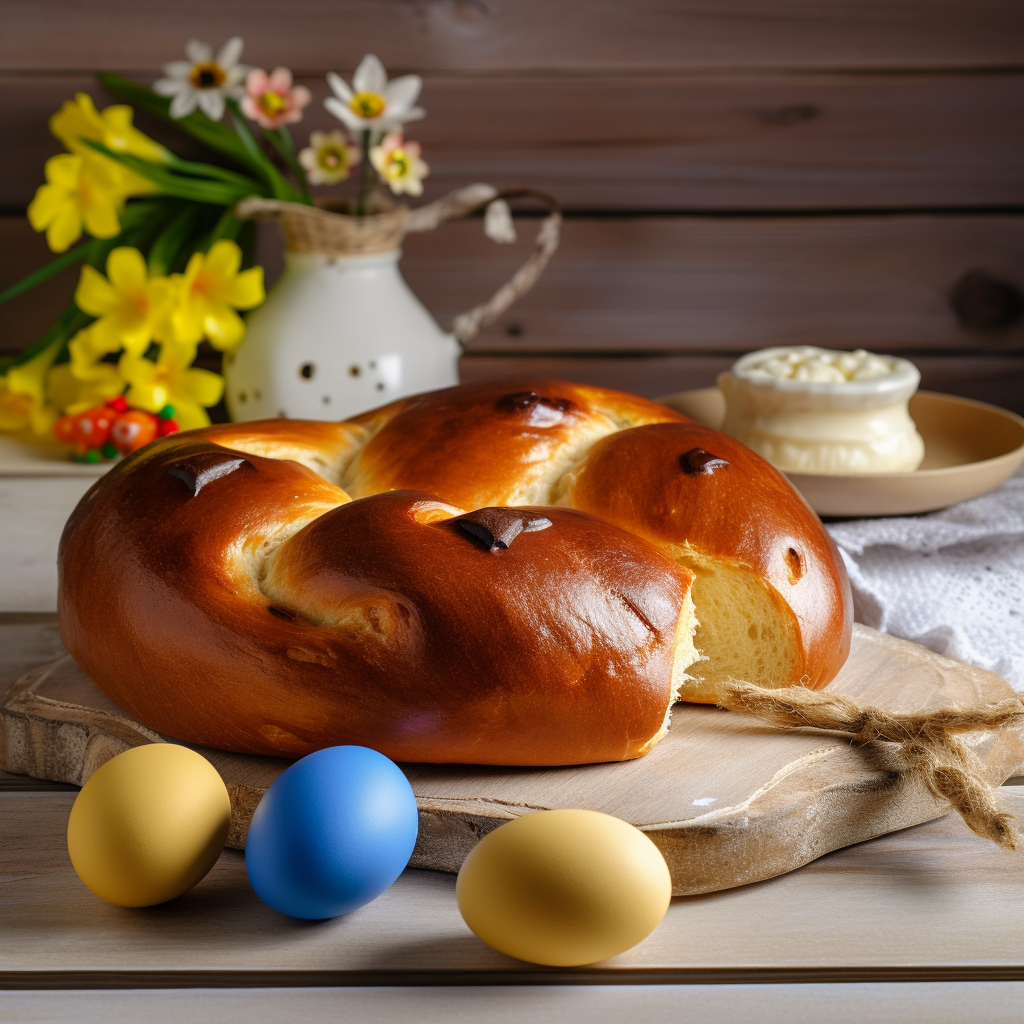
As the sweet aroma of the bread filled my kitchen and the colorful Easter eggs nestled into the dough, I felt pride. This wasn’t just about making bread; it was about creating something special for my family to enjoy together. When I finally pulled the golden loaves out of the oven and saw the smiles on their faces, I knew it was worth the effort.
Since then, Italian Easter bread has become a cherished tradition in our home. Every year, as Easter approaches, we gather in the kitchen to mix, knead, and bake this sweet treat together. It’s not just about the bread; it’s about the memories we create along the way. So roll up our sleeves, preheat the oven, and get cooking.
What is Italian Easter Bread?
Italian Easter bread, also known as “Pane di Pasqua,” is a traditional sweet bread made especially for Easter celebrations in Italy. It’s a soft, slightly sweet bread that’s often flavored with ingredients like citrus zest, anise, or vanilla. The dough is sometimes braided or shaped into decorative forms, like wreaths or crosses, symbolizing the holiday’s significance.It’s a delightful way to celebrate the holiday with family and friends, sharing not only delicious flavors but also the joy and spirit of Easter.
Italian Easter Bread Recipe
Equipment
- Mixer (optional)
- Parchment Paper or Silicone Baking Mat
- Pastry Brush
- Oven
- Cooling Rack
- Easter Eggs (optional)
Ingredients
- 1 1/4 cups milk or half and half
- 1/3 cup unsalted butter
- 2 1/4 teaspoons instant yeast
- Pinch of salt about 1/16 teaspoon
- 2 eggs lightly beaten
- 1/2 cup sugar
- 4 cups bread flour approximate
- 1 large egg
- 1 teaspoon water
- Rainbow nonpareils
- 6 raw eggs room temperature dyed in rainbow colors
Instructions
- Activate Yeast: Warm milk and mix with yeast and a bit of sugar. Let it sit until foamy.
- Prepare Dough: Combine flour, sugar, salt, and flavorings in a mixing bowl. Add yeast mixture, softened butter, and eggs. Knead until smooth.
- First Rise: Place dough in a greased bowl, cover, and let it rise until doubled in size, about 1 hour.
- Shape Loaves: Divide dough and shape into desired forms, like braids or wreaths. Nestle dyed Easter eggs into the dough.
- Second Rise: Let shaped loaves rise again until they puff up, about 30 minutes.
- Preheat Oven: Meanwhile, preheat the oven to the specified temperature.
- Egg Wash: Brush risen loaves with egg wash for a shiny finish.
- Bake: Place loaves on a baking sheet lined with parchment paper or a silicone mat. Bake until golden brown and cooked through.
- Cool: Transfer baked bread to a cooling rack and let it cool completely before slicing and serving.
Notes
Nutrition
Time for the Tips!
- Use Fresh Ingredients: Fresh ingredients like active yeast and eggs will yield the best results.
- Properly Activate Yeast: Ensure your yeast mixture becomes foamy before adding it to the dough. If it doesn’t foam, the yeast may be inactive, and your bread won’t rise properly.
- Knead the Dough Well: Kneading the dough thoroughly helps develop gluten, giving the bread its desired texture. It should be smooth and elastic.
- Allow Sufficient Rising Time: Let the dough rise in a warm, draft-free place until it doubles in size. This step is crucial for achieving a light and fluffy texture.
- Get Creative with Shapes: Have fun shaping your Italian Easter bread into braids, wreaths, or other decorative forms. Don’t forget to nestle dyed Easter eggs into the dough for a festive touch.
- Apply Egg Wash Generously: Brushing the risen loaves with egg wash before baking gives them a beautiful golden color and shine.
- Monitor Baking Closely: Keep an eye on the bread while it’s baking to prevent over-browning. If necessary, cover it loosely with foil halfway through baking.
- Allow Bread to Cool: Let the baked bread cool completely on a wire rack before slicing. This allows the flavors to develop and prevents it from becoming soggy.
What to serve with Italian Easter Bread?
